Try Demo
Talk to Adoption Engineer
Whitepaper
1. Introduction
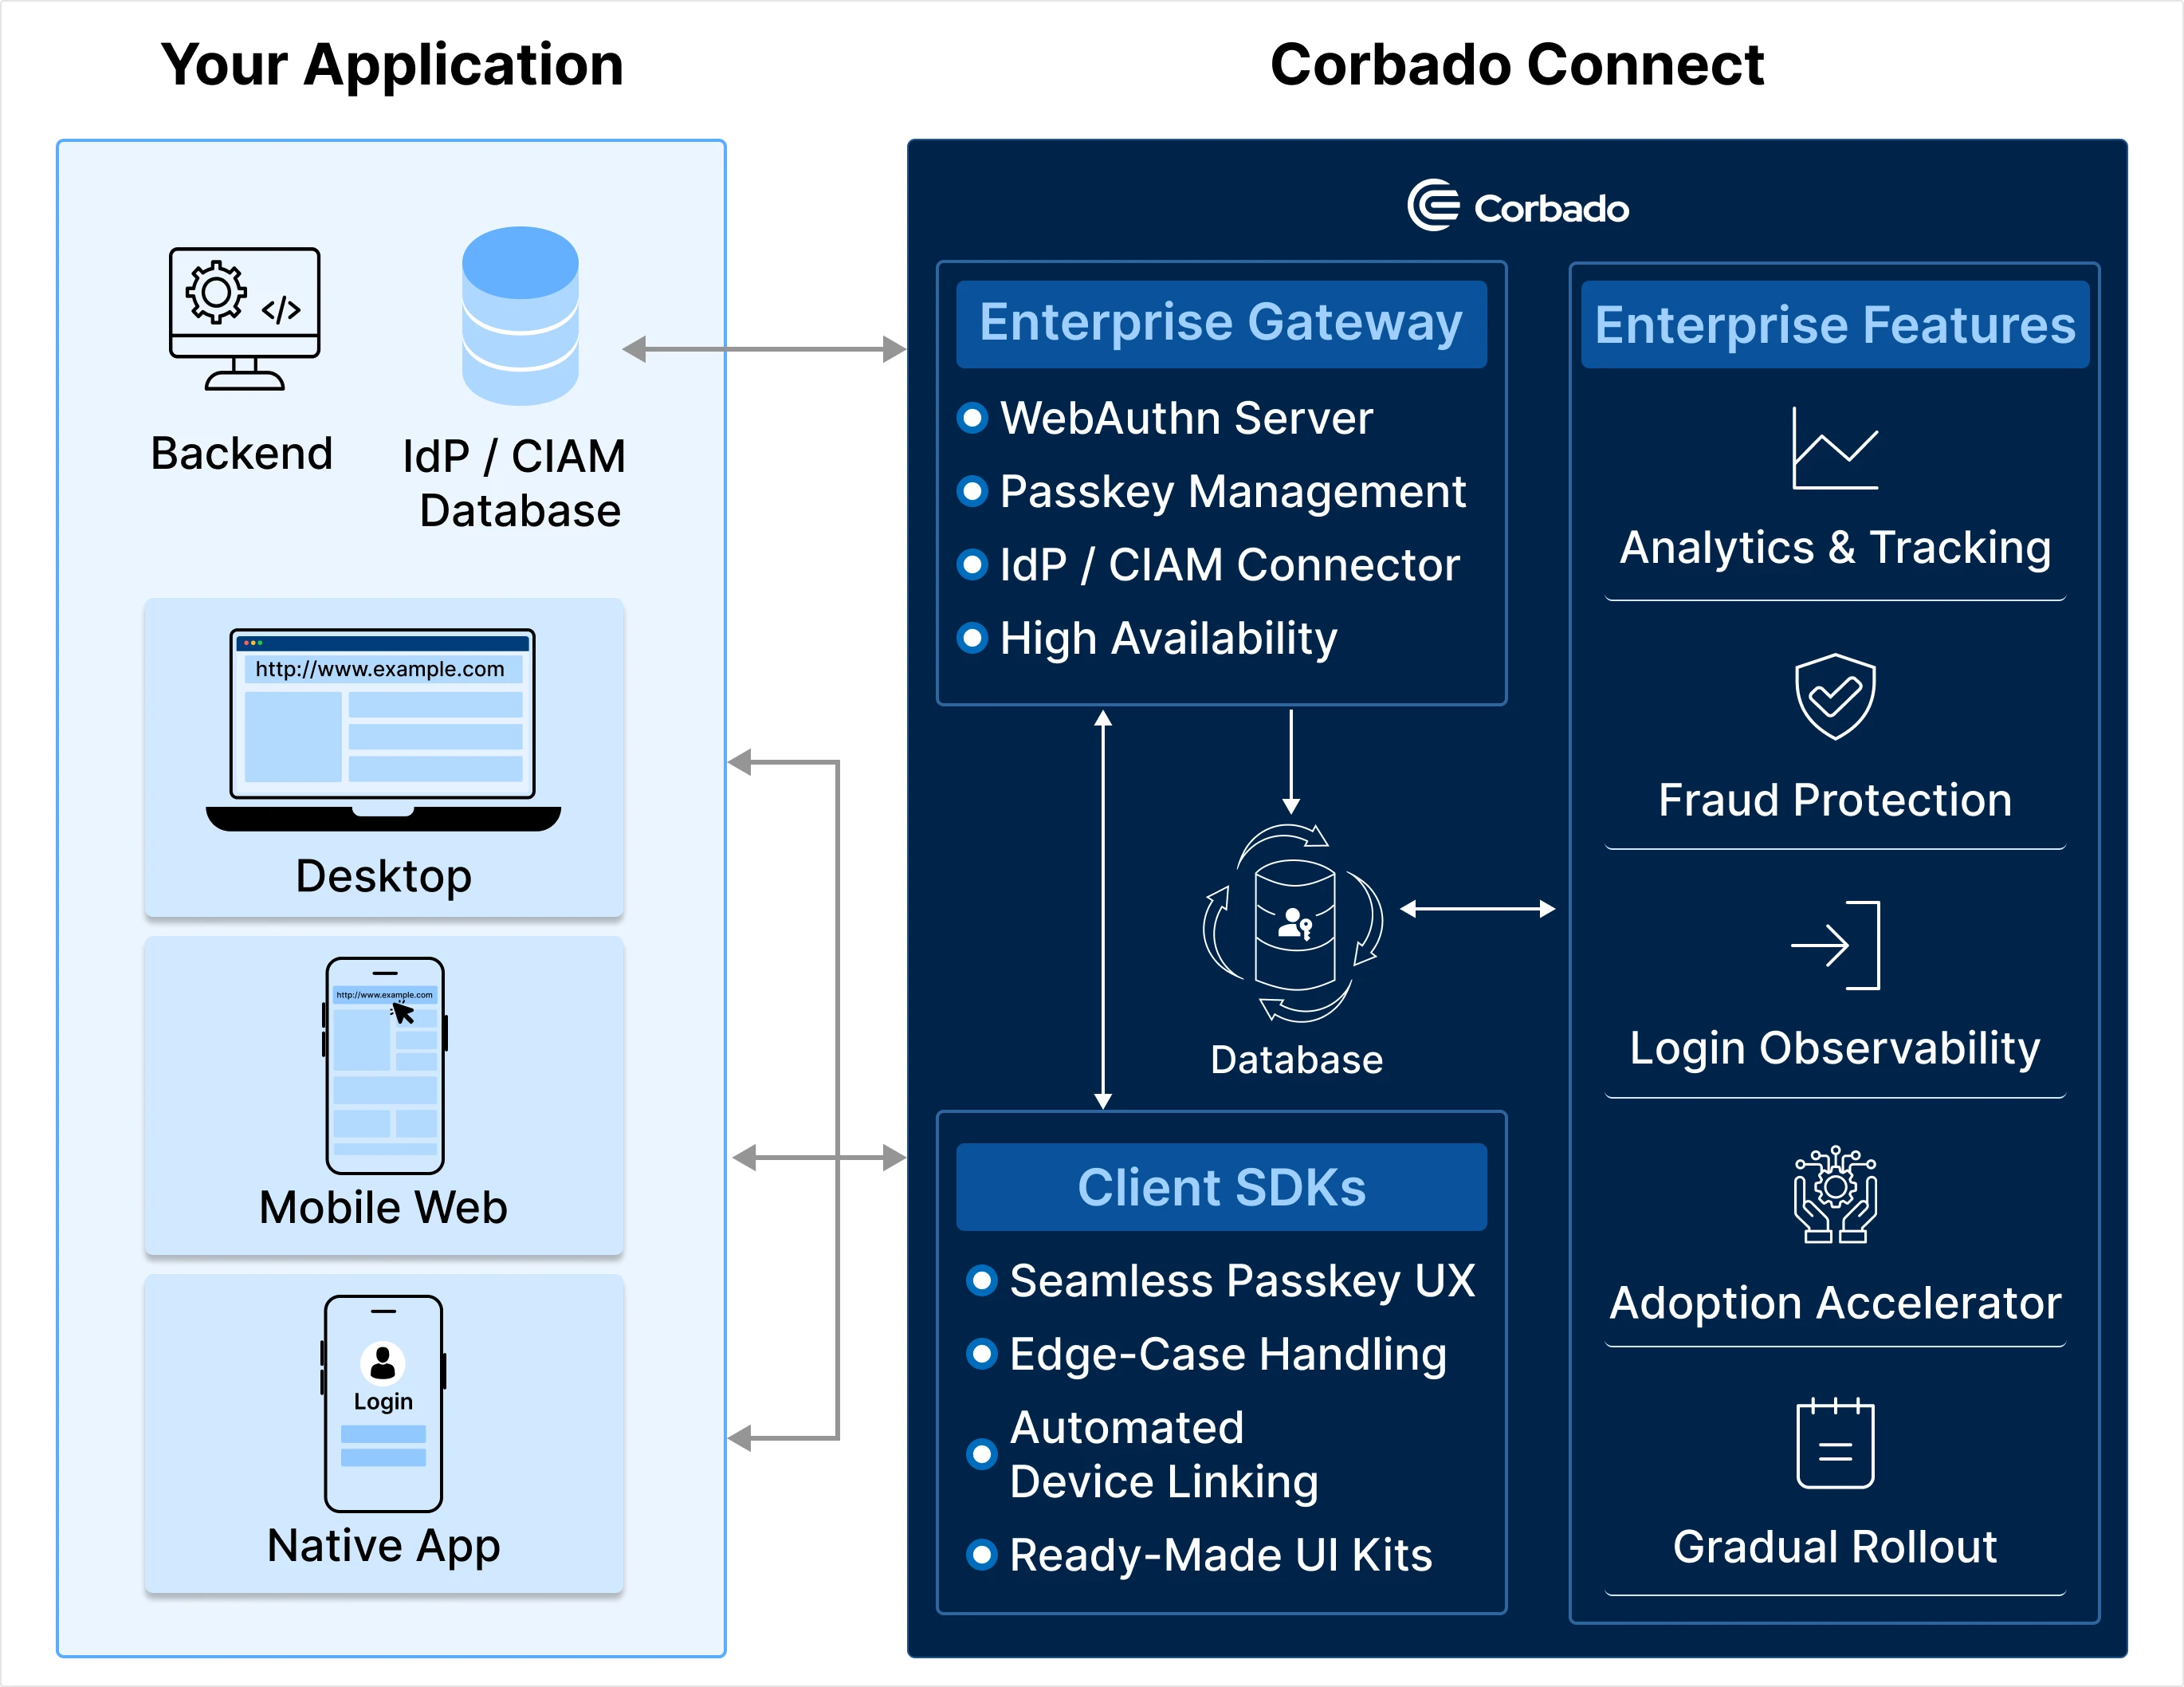
Corbado Connect is designed for large-scale enterprise consumer deployments that want to deliver secure, user-friendly passkey authentication without undergoing complex migrations or replacing their current authentication stack. By layering passkeys on top of your existing systems, Corbado Connect enables a gradual, risk-free transition to the future of authentication.2. What’s Corbado Connect?
- Passkey Enterprise Platform
Enterprise-grade WebAuthn server with modular components designed for large-scale deployments. - Zero User Migration
Seamlessly connect to your existing IdPs or CIAMs without requiring any transfer of user data. - Passkey Layer
Integrates alongside your current authentication system to add enterprise-level passkey functionality - no rip-and-replace required. - Passkey-Optimized UX
Pre-built frontend modules ensure a frictionless passkey setup and login experience across diverse user devices.
3. Enterprise Features
- Analytics & Tracking
Gain real-time insights into user engagement and passkey adoption rates. - Fraud Protection
Get notified about unusual login activities. - Login Observability
Monitor login events and activity with enterprise-grade reporting and auditing. - Adoption Accelerator
Optimize your passkey rollout strategy to achieve higher user adoption. - Gradual Rollout
Implement passkeys incrementally, preserving existing authentication flows and minimizing end-user friction.
4. Enterprise Use Cases
- Drive Long-Term Customer Loyalty
Improve user login success rates while establishing a more secure, future-proof relationship with your customers. - Maintain Ownership of User Data
Keep your user database in place; no need to migrate or relinquish control of critical identity information. - Preserve Existing Authentication Methods
Continue to offer passwords, 2FA or other methods to ensure business continuity and a seamless user experience until you start your passwordless strategy. - Enhance Security Without Disruption
Add passkeys as a standalone layer - ensuring immediate security enhancements without any drastic changes to your authentication flow.
5. Key Benefits for Enterprise
- Strengthen Your Existing Authentication Stack
Bolster security with passkeys while preserving your established processes. - Elevate the Auth Experience
Provide a streamlined login journey that fosters higher user engagement and trust. - No Risk of Data or UX Overhaul
Retain your existing identity data, workflows, and UI. Transition at your own pace and mitigate user friction. - Future-Proof Your Security Strategy
Embrace advanced passkey standards that adapt to evolving security needs, ensuring scalability and compliance.