Overview
Integrate Google’s social connection with your app using Corbado by configuring the Client ID and Client Secret in your Corbado project’s settings. For a streamlined development experience, Corbado provides preconfigured shared OAuth credentials and redirect URIs for development instances, which require no further setup. However, for production environments, it is necessary to establish your own Google developer account and generate unique OAuth credentials.Preliminary Steps
- Create a Corbado project via the Corbado developer panel. More details are available in Getting Started.
- Create a Google Developer account by visiting the Google Cloud console.
Configuration Steps for Google Social Connection
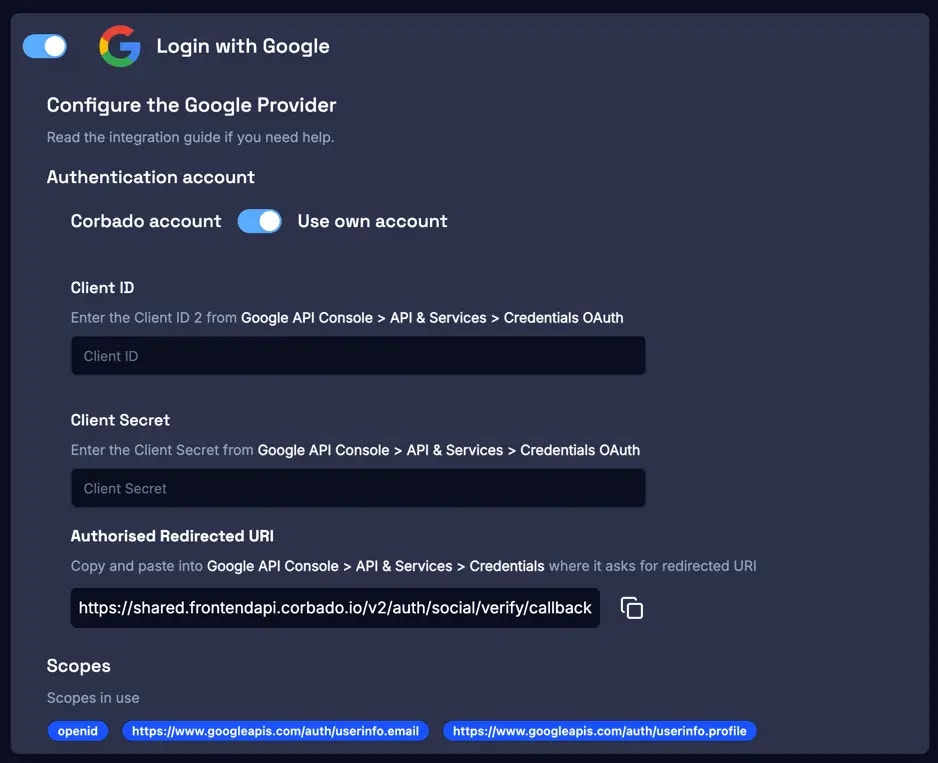
- In the Corbado developer panel, navigate to Settings > User Interface > Social. Activate the Google option and ensure “Use custom credentials” is selected. Copy the Authorized Redirect URI for later use.

- Open the Google Cloud Platform console in a new window. Select your project and enable OAuth 2.0 support as per the official setup instructions. In the “Authorized redirect URIs” section, paste the URI copied from the Corbado developer panel.

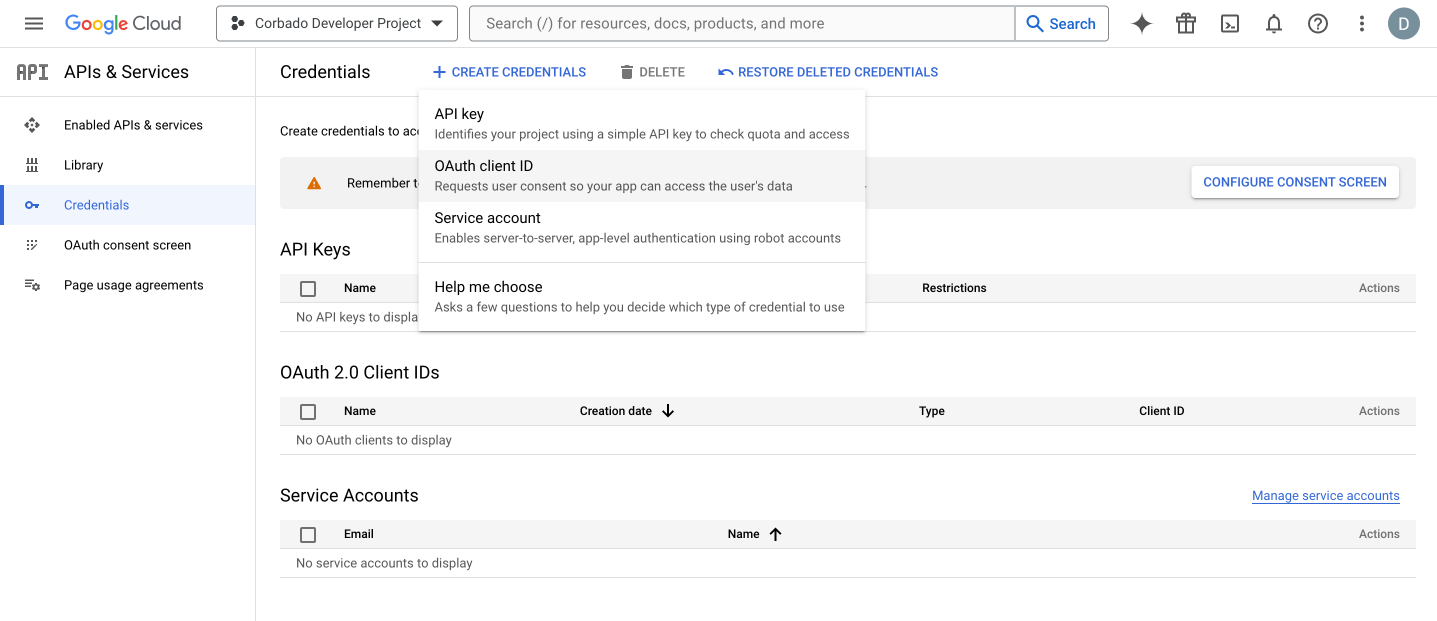
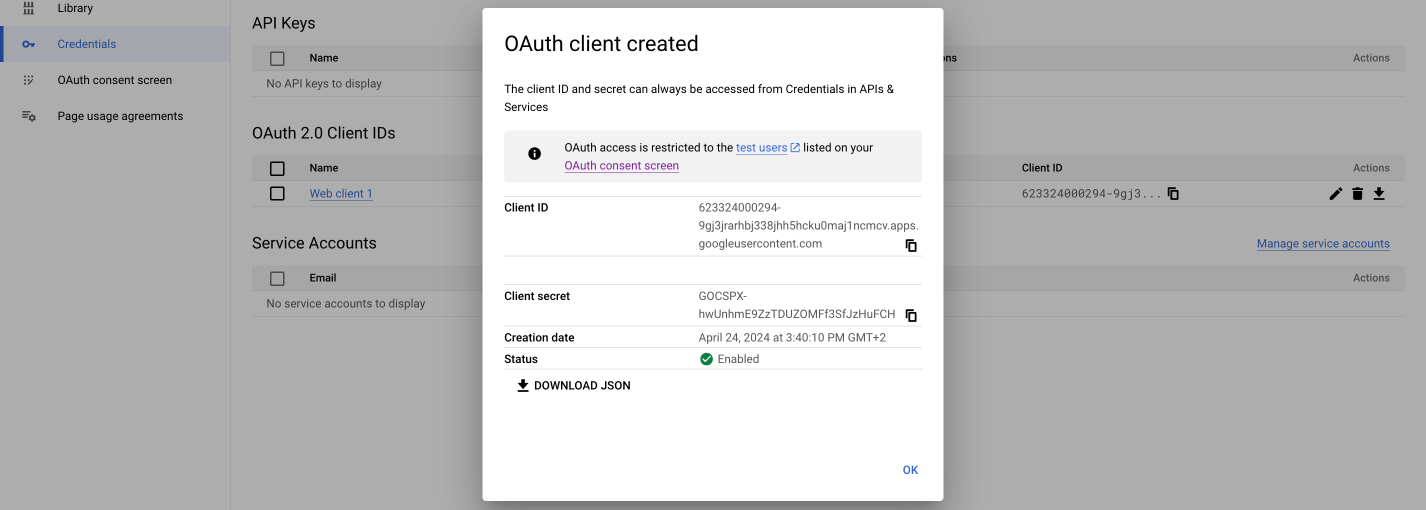
- Create an OAuth client ID in the Google Cloud console. Once created, copy the Client ID and Client Secret.

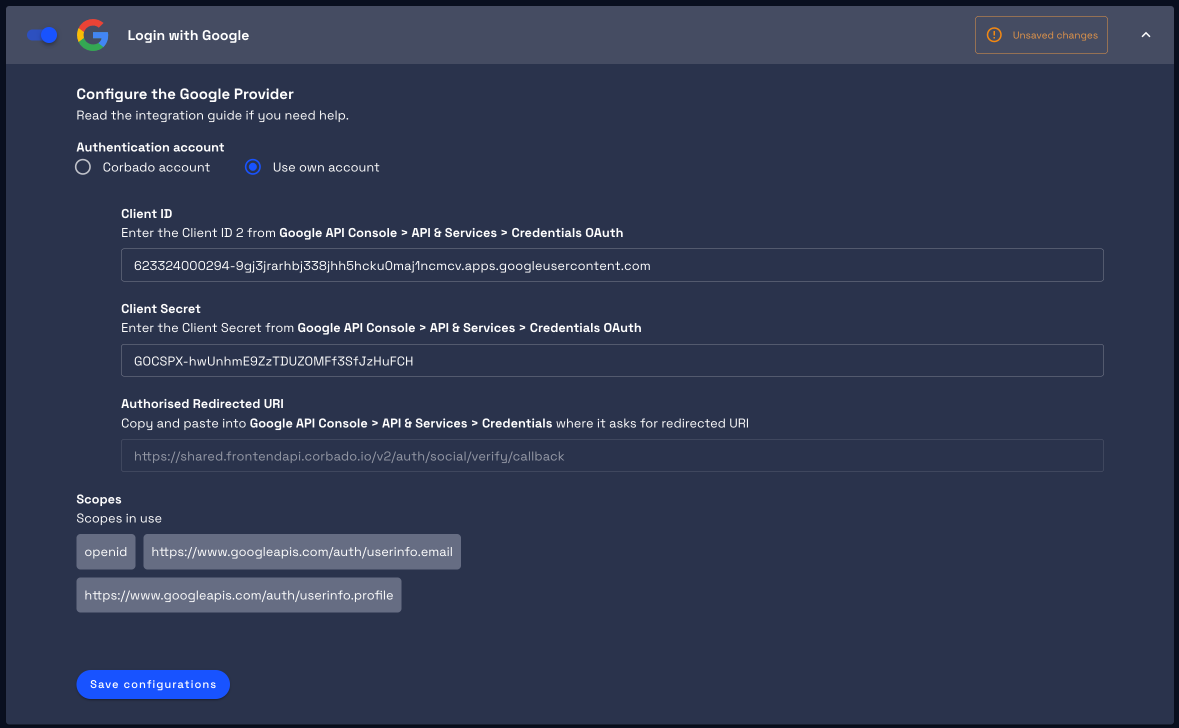
- Return to the Corbado developer panel, and in the modal window, paste the Client ID and Client Secret you just obtained.

Recap
By following this guide, you should have:- Created an OAuth client ID in Google Cloud Platform.
- Entered the authorized redirect URI as provided by the Corbado developer panel into the OAuth client ID.
- Configured the proper Client ID and Client Secret in the Corbado developer panel based on the values obtained from Google Cloud Platform.